

JConcepts Aluminum Servo Mount Bracket Blue RC10B7 B7D 5161-1
JConcepts Aluminum Servo Mount Bracket Blue RC10B7 B7D 5161-1
Regular price
$23.80
Sale price
$23.80
Regular price
Out of stock
Shipping calculated at checkout.
Couldn't load pickup availability
 Reliable shipping
 Flexible returns


Description
Description
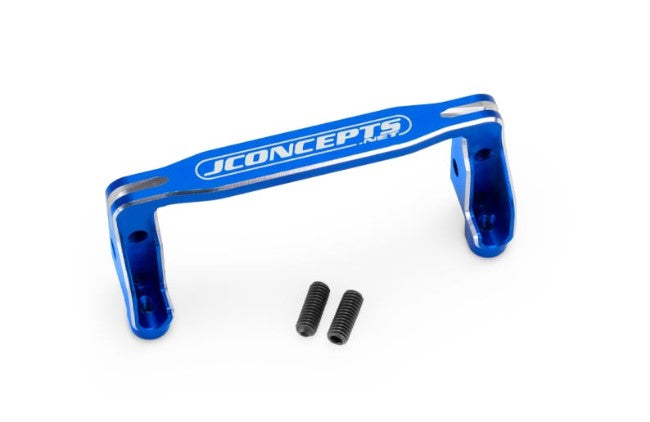
The servo mount brace can be installed without any modifications or additional equipment in RC10B7 vehicles. The most recent design for the latest Team Associated vehicle incorporates a little extra room for servo mount lead on popular servos like the Savox and other similar models. With a sleek wrap-around design, luster of aluminum, and etched JConcepts.net logo, the brace adds consistency, performance tune-ability with aesthetic appeal. JConcepts is, World Proven Innovation and Design.
Installation notes -
To install, completely remove servo from vehicle and remove standard mounts. With the servo horn already in the correct position, align plastic shims or without as previously used on the servo. Install brace to each side and loosely fasten factory mounting screws with washers into the 4 locations and snug them. Now, center the servo between the brace and install the set screws on each side, use a light amount of thread locking compound (#8136) RM2 thread lock adhesive and snug them to touch off and keep the servo in place.
Completely clamp the 4 mounting screws on the front side to lock servo position. Remember to always use a light amount of thread locking compound when securing steel screws into aluminum. Reinstall the servo to vehicle and trim out and check EPA adjustments to complete assembly.
Features:
JConcepts original design and function
Machined aluminum, wrap-around concept
Set screw-controlled centering feature
100% Secure Checkout
Protected payments with industry-leading security standards.
Fast Worldwide Delivery
Fast processing and dependable shipping on every order.
Genuine Products
Only authentic products from trusted RC industry brands.
Flexible returns
Simple returns and dedicated support when you need it.